The ZendFx feature is now available on your Zend Business account, allowing your company to make payments in USD, EUR, CAD, or GBP.
To get started, visit ZendWallet.com and sign up to create your Zend Business account. Be sure to complete the KYB (Know Your Business) verification process by submitting your company details.
You can also add directors to your account for better management. Additionally, ZendBusiness offers a “Members” feature, enabling you to add team members and assign various permissions based on their roles.
Once your account is set up, you can access ZendFx to initiate cross-border transactions in USD, EUR, CAD, or GBP to countries like China, Tanzania, and more.
How to Get Started with ZendFx
ZendFx offers a reliable way for businesses to handle international transactions through the Zend Business account on Zendwallet.
By providing secure and fast payment options in USD, EUR, and GBP, you can ensure your business stays connected globally.
To begin using the ZendFx feature, follow these simple steps:
Sign Up on ZendWallet.com
Visit ZendWallet.com to create your Zend Business account. Provide the necessary information to set up your account.
Complete the KYB Verification Process
After signing up, you must complete the Know Your Business (KYB) verification. This step ensures that your business is compliant with regulations and establishes trust within the payment ecosystem.
Submit Your Company Details
Provide your company information during the verification process, including business name, registration details, tax identification number, and any other relevant documents.
Important Note
Payments through the ZendFx feature are exclusively available on Zend Business accounts. To access these features, ensure you are using a Zend Business account.
How ZendFx Works for Business Payment Transactions
Zend Fx offers a reliable way for businesses to handle international transactions through the Zend Business account.
With secure and fast payment options in USD, EUR,CAD and GBP, your business can stay connected globally.
Key Features of Zend Fx:
Multi-Currency Transactions: Conduct transactions in USD, EUR,CAD or GBP.
Global Reach: Send payments to and from various countries, including China, Tanzania, and many others.
Secure Processing: Your transactions are protected through strong security protocols.
Steps to Use Zend Fx
Once your account is set up, KYB (Know Your Business) verification is completed, and your account is verified, follow these steps to start using the ZendFx feature:
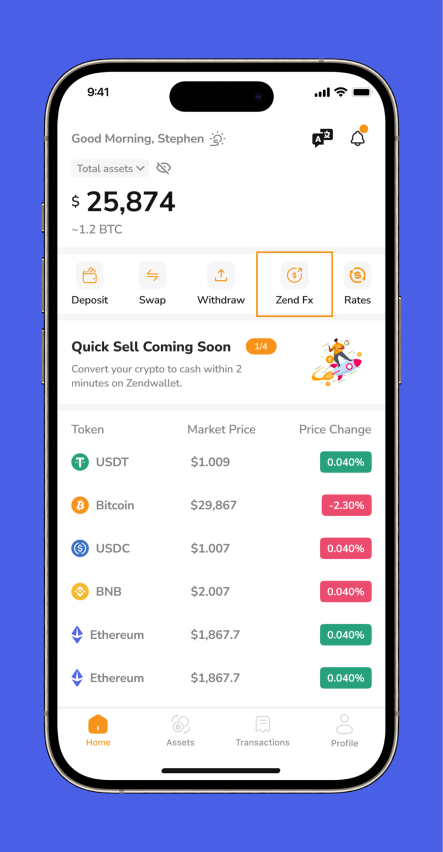
Step 1: Access Zend Fx
Log in to your Zend Business account and head to the ZendFx section.
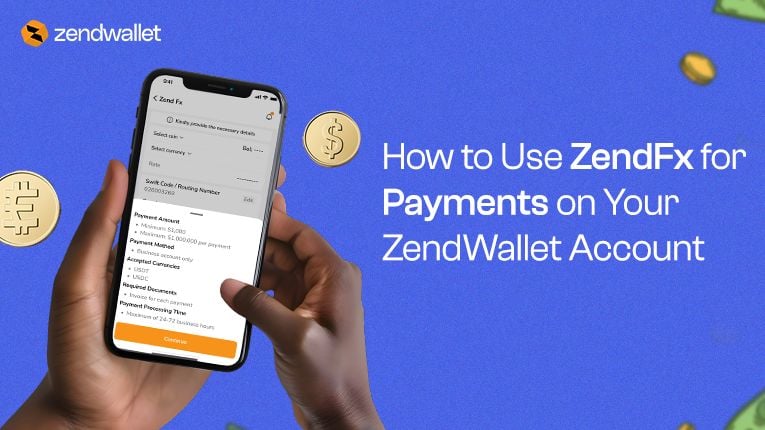
Step 2: Payment Method
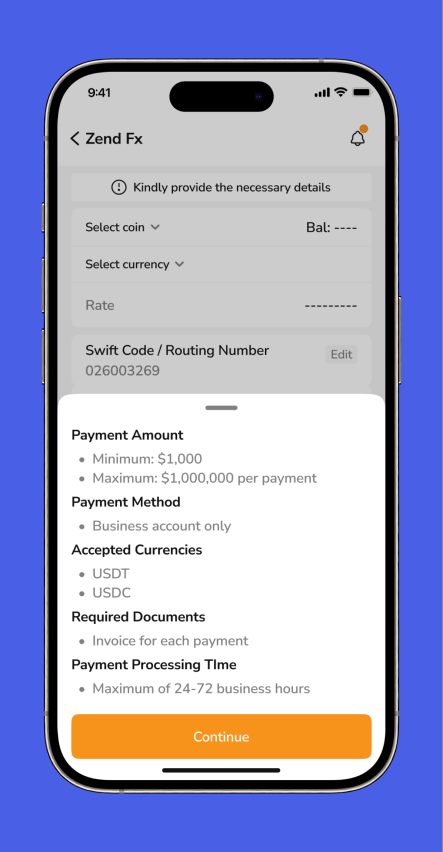
When making payments through ZendFx, ensure the following details are met:
- Payment Amount:
- Minimum: $1,000
- Maximum: $1,000,000 per payment
- Payment Method:
- Payments can only be made from a Zend Business account.
- Accepted Currencies:
- USDT (Tether)
- USDC (USD Coin)
- Required Documents:
- An invoice is required for each payment to verify the transaction.
- Payment Processing Time:
- Transactions are processed within 24 to 72 business hours. Therefore, you should account for this timeframe in your business planning.
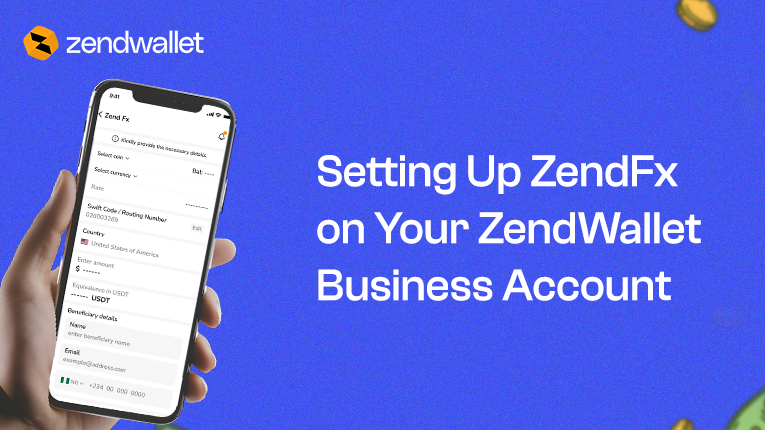
Step 3: Enter SWIFT Code
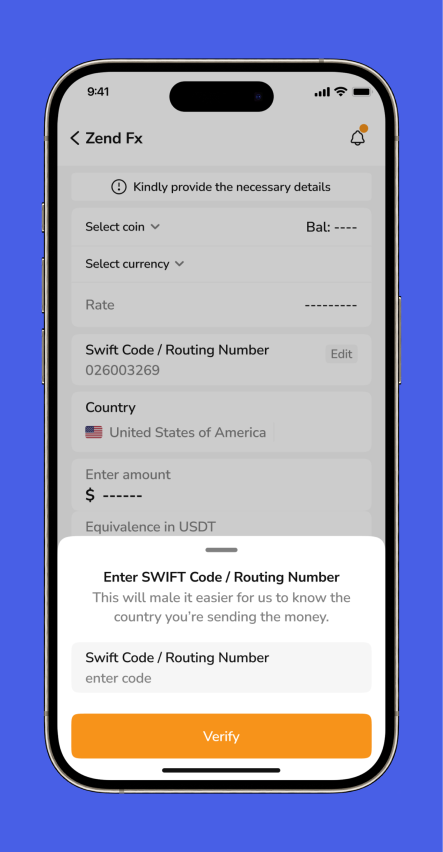
Enter the SWIFT Code or Routing Number for the recipient’s bank. This unique identifier ensures that your funds are routed correctly through the global banking network to the intended bank.
About SWIFT Codes:
A SWIFT code (also known as a BIC) uniquely identifies banks worldwide, confirming accurate routing for your funds.
You can find the SWIFT code on the bank’s official website or by contacting their customer service.
Example SWIFT Code:
For banks in the U.S., an example SWIFT code might look like this: 026003269.
Step 4: Select Cryptocurrency
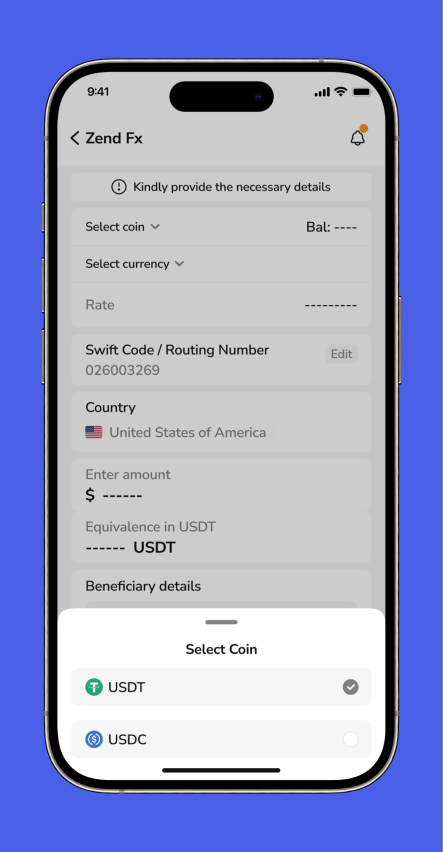
Choose the cryptocurrency you wish to use for this transaction:
- USDT (Tether)
- USDC (USD Coin)
Step 5: Choose the Payment Currency
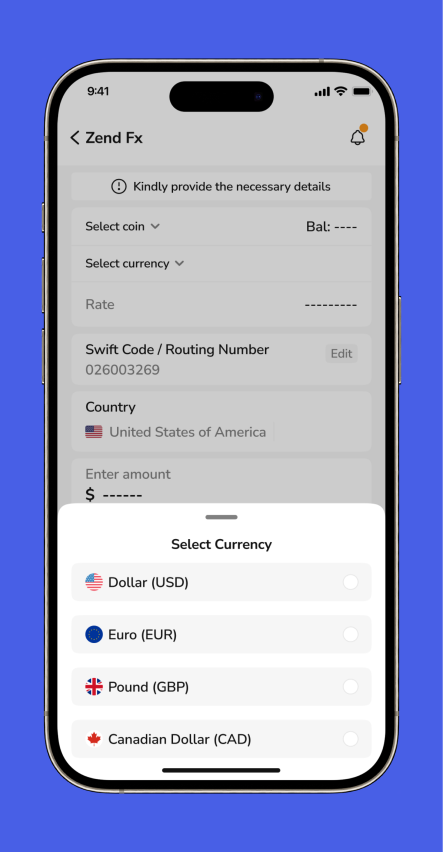
Select the foreign currency you’d like to use for the transaction:
- Dollar (USD)
- Euro (EUR)
- Pound (GBP)
- Canadian Dollar (CAD)
Example:
If you choose USDT (Tether):
- Balance: 20,000.232 USDT
This is the amount of Tether available in your account. - Rate: 1 USDT = 1 USD
Each USDT equals one U.S. dollar. So, if you send 50,000 USDT, it will convert to 50,000 USD.
Conversion Rate:
This peg ensures stability; your USDT maintains a one-to-one value with USD. Always check the displayed conversion before confirming your payment to ensure accuracy.
Step 6: Enter Payment Amount
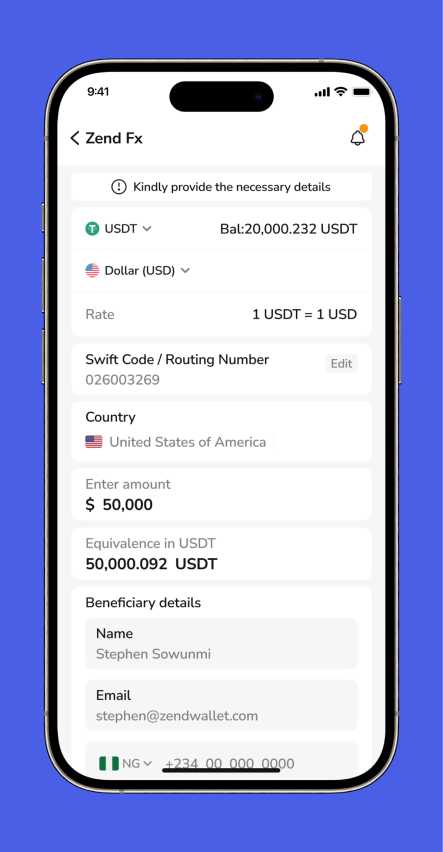
Specify the amount you intend to send. The system will automatically calculate its equivalent in USDT or USDC based on your selected currency.
- Example:
- Amount: $50,000
- Equivalent in USDT: 50,050 USDT
Step 7: Provide Beneficiary Details
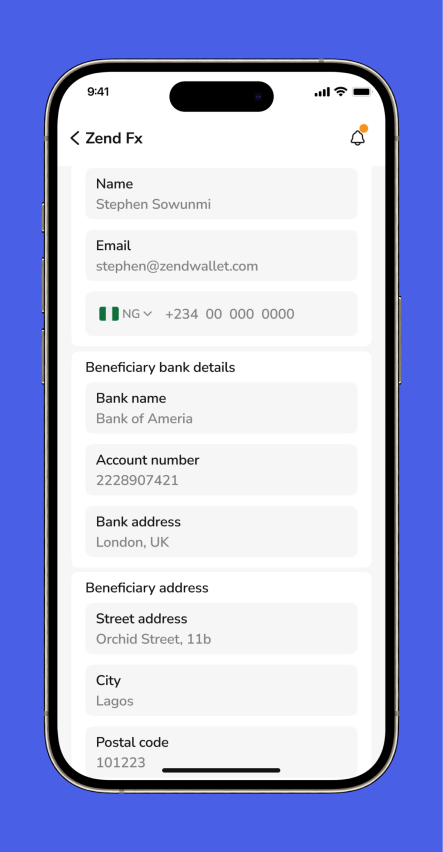
To ensure a smooth fund transfer, enter the essential beneficiary details before specifying the bank information:
- Beneficiary Name: Enter the recipient’s name.
- Beneficiary Email: Provide a valid email address.
- Phone Number: Include the phone number formatted with the country code.
- Example:
- Beneficiary Name: Stephen Sowunmi
- Email: stephen@zendwallet.com
- Phone: +234 81 4069 7549
- Example:
Step 8: Provide Beneficiary Bank Details
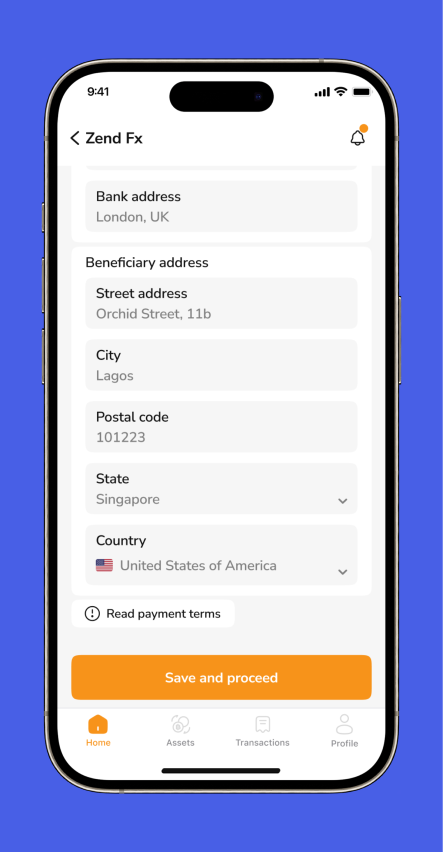
After entering the beneficiary’s basic details, proceed with the bank details to ensure correct routing.
- Bank Name: Specify the recipient’s bank.
- Account Number: Provide the account number associated with the beneficiary.
- Bank Address: Enter the physical address of the recipient’s bank.
- Account Name (optional): If applicable, enter the account name.
- Example:
- Bank Name: Bank of America
- Account Number: 2228907421
- Bank Address: London, UK
- Account Name: Majestic Elujoba
Step 9: Specify the Beneficiary Address
Provide the beneficiary’s full address details for additional verification.
- Street Address: Orchid Street, 11b
- City: Lagos
- Postal Code: 101223
- State: Singapore
- Country: United States of America
Step 10: Upload Payment Invoice
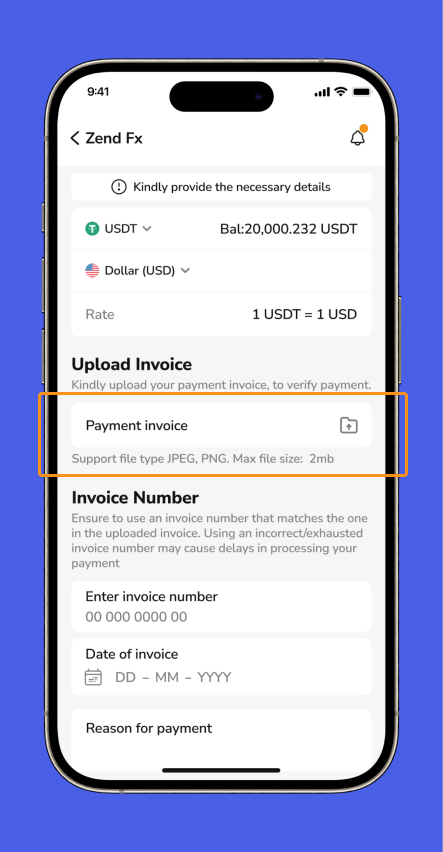
Each payment requires an uploaded invoice to confirm its authenticity. This step helps verify the payment’s nature and prevent issues like money laundering.
- Supported File Types: JPEG, PNG
- Max File Size: 2MB
Step 11: Enter Invoice Number
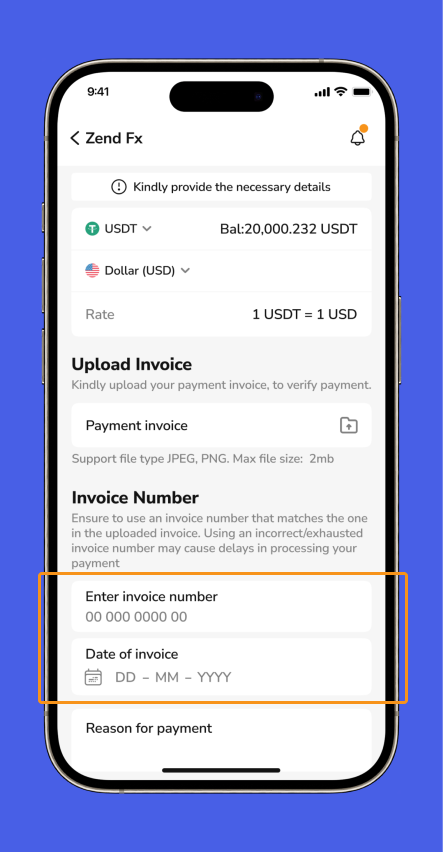
Ensure that the invoice number provided matches the uploaded document. An incorrect or previously used invoice number could cause delays.
- Example Invoice Number:
00 000 0000 00
Step 12: Leave a Note (Optional)
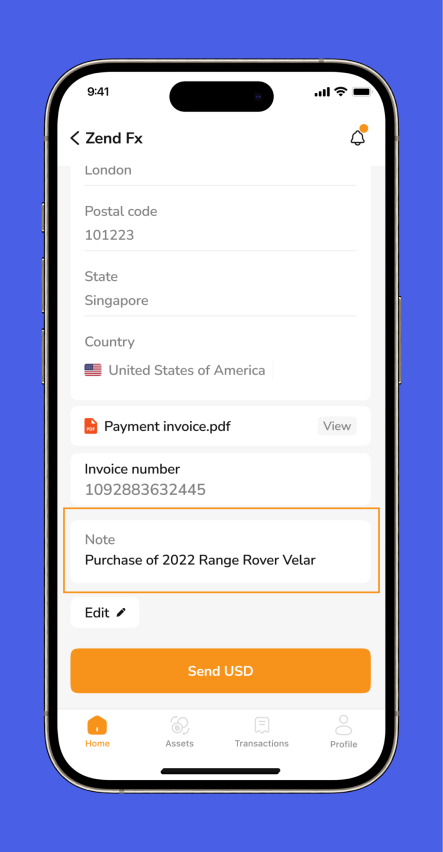
You may include a brief note about the payment, specifying any important details relevant to the transaction.
Step 13: Account Verification
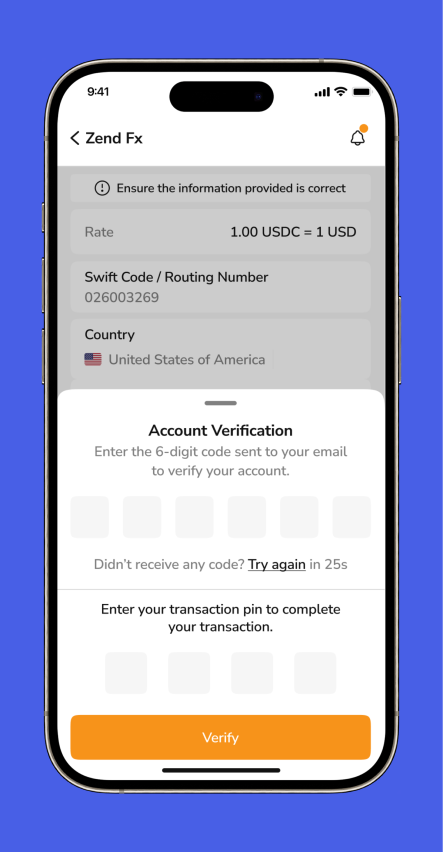
For added security, enter the 6-digit verification code sent to your email.
Note: If you don’t receive the code, you can request a new one after 25 seconds.
Enter your transaction PIN to finalize the payment.
Step 14: Submit Your Transaction
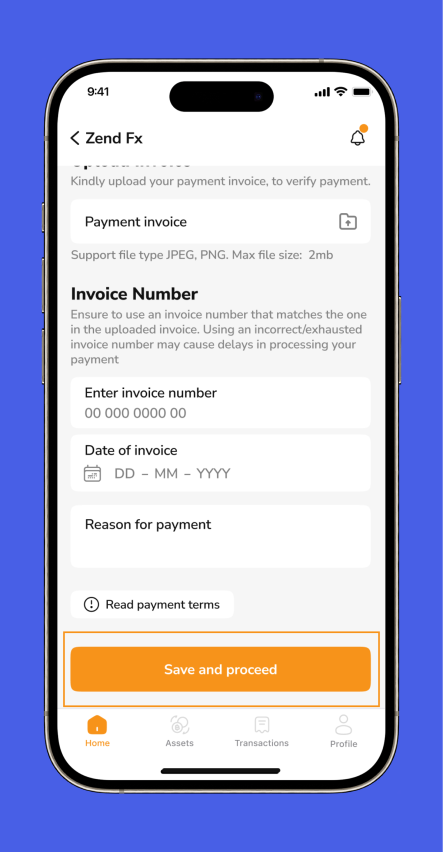
After verifying all details, click Save and Proceed to submit the transaction. You will receive a confirmation message, confirming your transaction’s success.
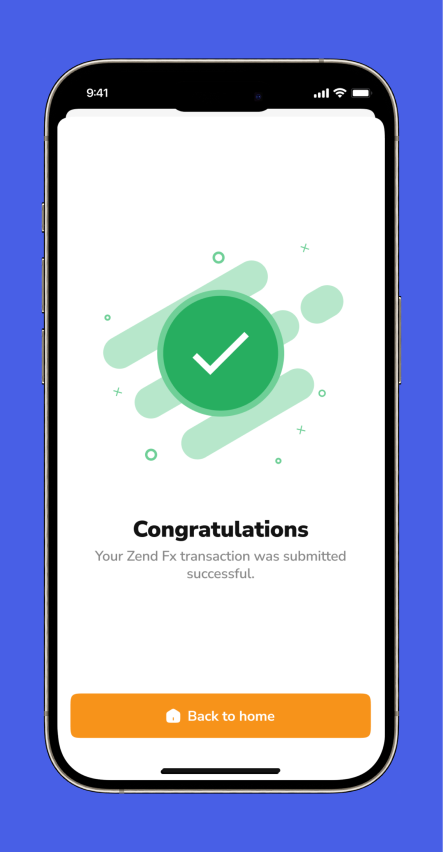
Example Confirmation Message:
Congratulations! Your Zend Fx transaction was submitted successfully.
Also Note: Before fully utilizing this feature, ensure you’ve completed your KYB (Know Your Business) verification process.
Processing Time Reminder:
Payments made through ZendFx generally require 24 to 72 business hours for processing, so consider this timeframe in your planning.
Conclusion
With the ZendFx feature on Zend Business, managing international transactions has never been easier.
By following these steps, you can easily send payments globally in your preferred coins and currencies for your purchases.
Sourcing goods from China, Tanzania, or any other country? ZendFx ensures your transactions are secure, legitimate, and swiftly processed.
For any assistance, please refer to our help centre or contact our support team at support@zendwallet.com
